How to Manually Install Elasticsearch on Windows
Since it’s release, PeopleSoft Elasticsearch DPK install has had a few issues, which cause install of Elasticsearch to fail for a variety of reasons. We’ve covered some of them earlier and since new DPK install updates have been having some issue or the other, we thought it would be best to cover the manual install procedures as well.
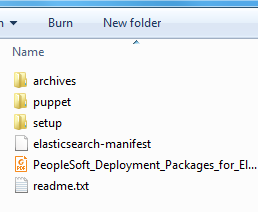
There have been two options to download Elasticsearch, one via Oracle Cloud and another one via My Oracle Support. Unfortunately naming conventions have not been consistent, which adds to confusion. Best option is to download Elasticsearch 2.3.2 from Oracle Cloud. Click here to download version 2.3.2 from Oracle Cloud (V844469-01.zip : Elasticsearch 2.3.2 for PeopleSoft Deployment Package for Microsoft Windows x64 – Revision 2).
Once downloaded, unzip V844469-01.zip. You can unzip it to any directory with a new name or the same name. We’ll extract it to a directory which goes by Oracle naming convention and call it ES_INSTALL.
Now, if were to do an automatic install wherein all the needful components get installed where they need to, we would be running the script ES_INSTALL\setup\psft-dpk-setup.ps1 but since, this manual step is needed in cases wherein you’re having issues running and installing Elasticsearch through psft-dpk-setup.ps1, we’ll walk you through the additional steps needed in case of a manual install of Elasticsearch.
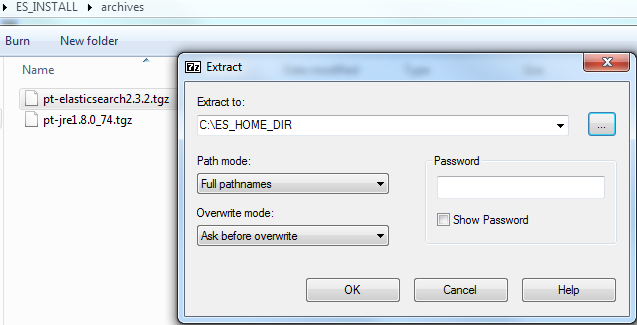
Create the following directories in the location of your choice, probably C drive or D Drive:
- Create a directory where Elasticsearch will be installed. You can create it with any name of your choice. Oracle naming convention for the same is ES_HOME_DIR.
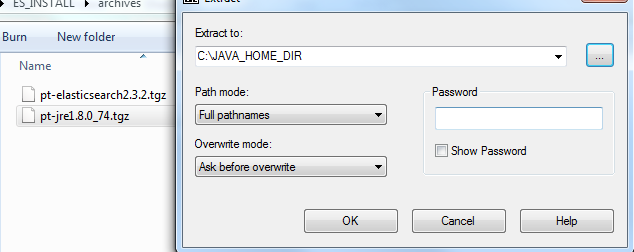
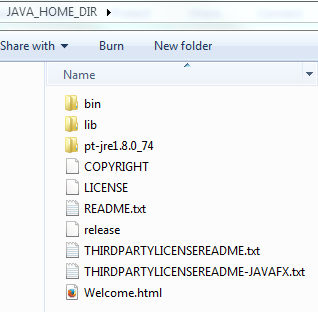
- Create a directory where JRE will be installed. You can create it with any name of your choice. Oracle naming convention for the same is JAVA_HOME_DIR.
Go to ES_INSTALL\archives and extract the pt-elasticsearch2.3.2.tgz to ES_HOME_DIR
Now extract pt-jre1.8.0_74.tgz to JAVA_HOME_DIR
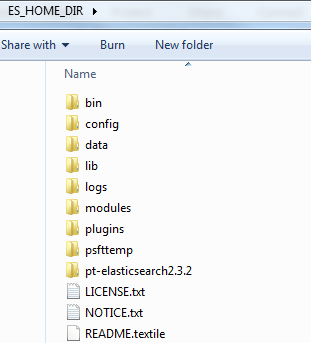
Once extracted, ES_HOME DIR should look like this:
and JAVA_HOME_DIR should look like this:
When you do the automatic install using DPK, it invokes elasticsearch.yml and prompts you to provide input but in case of manual install, you’ll need to edit elasticsearch.yml and do the setup.
Go to ES_HOME_DIR\config and open elasticsearch.yml in a text editor.
You’ll need to uncomment the following parameters and assign values to them. Sample assignment values are provided:
- cluster.name search
- path.data C:\ES_HOME_DIR\data
- path.logs C:\ES_HOME_DIR\logs
- network.host 127.0.0.1
- http.port 9200
- discovery.zen.ping.unicast.hosts[“127.0.0.1”, “[::1]”]
- discovery.zen.minimum_master_nodes 3
Depending on whether you use proxy servers or not – you’ll need to comment or assign values to the below parameters (these are uncommented by default):
- orcl.proxy.host
- orcl.proxy.port
*Note that elasticsearch.yml is case-sensitive and space-sensitive.
Set the following environment variables:
- JAVA_HOME – Set it to your ES_HOME e.g. – C:\ES_HOME_DIR
- ES_HOME – Set it to your JAVA_HOME e.g. – C:\JAVA_HOME_DIR
- ES_HEAP_SIZE – Set it to a desired heap size e.g. – 2G
Make sure that the environment variable JAVA_OPTS is not set. Remove it if it exists.
By default, Elasticsearch will make use of 2 userids – esadmin and people. Their default passwords are esadmin and peop1e respectively. Either you can use the same passwords or you can change the passwords to whatever you desire. You can also add new userids instead of the above mentioned userids. You can update passwords, create new userids using the following command
ES_HOME\bin\elasticsearchuser.bat adduser username
Finally install and start Elasticsearch service using the following commands:
- ES_HOME\bin\service.bat install
- ES_HOME\bin\service.bat start

Make sure that the service has started. Go to services, make sure that the service is running and you may want to change the Startup type to “Automatic” instead of “Manual”
![]()
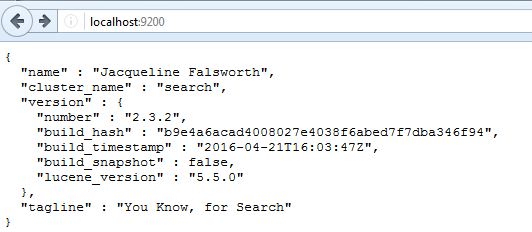
Go to a browser and type the following URL:
http://:
and you’d be prompted to provide login credentials. You need to provide the user as esadmin and provide the password of esadmin.
For example: http://localhost:9200 and you should see something like below if Elasticsearch is working properly.
Hopefully that should be enough.
Tip: If Elasticsearch service does not start or starts and stops, try the troubleshooting steps mentioned in this post:
[…] Previous post: How to Manually Install Elasticsearch on Windows […]
We’re currently using Oracle SES on a dedicated server, should Elasticseach be install on a separate server as well, and would it be able to host separate Peoplesoft modules (HCM, ELM, FSCM. etc.)? Thanks
It is recommended that you install SES and Elasticsearch on separate servers. And yes, you can host multiple PS modules in the same instance.
Is anyone able to get Health Center to show the ElasticSearch details? We are using a PPM (Performance Monitor) system that does all our monitoring of our environments, and we cannot get PPM to show ElasticSearch details at all. We can see the app/web/prcs details just fine. I have been working with Oracle with no success. My hunch is that the rmiregistry.exe process needs to be running on our ElasticSearch cluster server, but hopefully someone has this working.
https://community.oracle.com/message/14241120#14241120
Go through above link, you will have idea also you can put you issue.
I install elasticsearch on dedicate server. Can you clarify in elasticsearch.yml discovery.zen.ping.unicast.hosts value, if I have multiple PS instances is it where you input to ip values here?
example:
discovery.zen.ping.unicast.hosts: [“100.0.0.1”], [“100.0.0.2”], [“100.0.0.3”]
Thanks